Restaurant food photography is a specialized field that combines art, technical skills, and a keen understanding of branding. The goal is to create images that make the viewer’s mouth water and entice them to visit the restaurant. Whether you’re a professional photographer or a restaurant owner looking to capture your culinary creations, these six essential tips will help you elevate your restaurant food photography game: focusing on angles, understanding ISO vs. aperture, creating image depth, incorporating branding, and choosing between landscape and portrait orientation.
1. Mastering Angles: Finding the Best Perspective
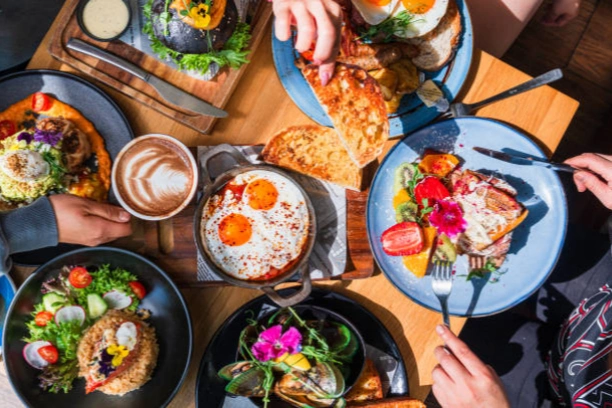
In food photography, the angle from which you shoot is crucial. Different dishes shine from different perspectives. For instance, flat foods like pizzas, tarts, or charcuterie boards are best photographed from a top-down angle to showcase all their ingredients. Meanwhile, tall or stacked dishes, such as burgers or layered cakes, often look better shot from a straight-on angle to highlight their height and layers.
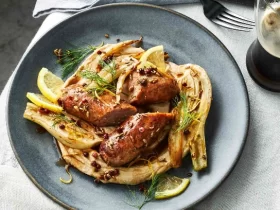
A 45-degree angle works well for many dishes, providing a more dynamic view that shows both the top and the side of the dish. This angle is especially good for plated entrees where you want to capture the depth and arrangement of the food. When choosing your angle, consider what you want to emphasize. Play around with different angles and take multiple shots to determine which works best for each dish.
2. ISO vs. Aperture: Achieving the Right Exposure
Understanding the relationship between ISO and aperture is key to mastering food photography in any setting, especially in restaurants where lighting conditions can vary widely. The ISO setting controls the camera’s sensitivity to light. A lower ISO (100-400) is ideal for well-lit environments, producing sharper images with less noise. However, in low-light settings typical of many restaurants, you may need to increase the ISO to 800 or higher. Be cautious, though—too high of an ISO can introduce graininess.
Aperture, measured in f-stops, determines the depth of field. A wider aperture (lower f-stop number, like f/1.8 or f/2.8) will create a shallow depth of field, blurring the background and focusing sharply on the dish, which is great for isolating the subject. Conversely, a narrow aperture (higher f-stop number, like f/8 or f/11) will keep more of the scene in focus, which can be useful for capturing multiple dishes in one frame or including more of the restaurant environment.
3. Creating Image Depth: Make Your Photos Stand Out
Depth adds dimension to your food photos, making them more engaging and dynamic. One way to create depth is through layering. Arrange props like cutlery, napkins, or other dishes at different distances from the camera. This creates a sense of space and guides the viewer’s eye through the image. Foreground elements (like a blurred wine glass) and background details (like a softly focused restaurant setting) add context and mood without stealing the spotlight from the main dish.
Bokeh, the aesthetic quality of the out-of-focus areas, is another technique to add depth. This is achieved by using a wide aperture to create a creamy background blur. This helps in focusing the viewer’s attention on the food while giving a professional and polished look to the photograph.
4. Highlighting Branding: Telling the Restaurant’s Story
Food photography for restaurants isn’t just about the food—it’s also about the brand. Great photos should convey the restaurant’s atmosphere, values, and personality. For example, a cozy, rustic restaurant might use warm tones, wooden surfaces, and natural light to communicate a homey, welcoming vibe. Meanwhile, a modern, upscale eatery might opt for sleek, minimalistic compositions with clean lines and cool tones.
When photographing, consider incorporating branded elements like the restaurant’s logo, distinctive table settings, or even the interior design in the background. This can subtly reinforce the brand identity and create a cohesive visual story. It’s not just about the food; it’s about the experience the restaurant offers.
5. Choosing Between Landscape and Portrait: Knowing When to Use Each
Choosing between landscape and portrait orientation can significantly impact how your food photos are perceived. Portrait orientation is often used for social media platforms like Instagram, where vertical images take up more screen space and tend to get more engagement. This orientation works well for single dishes, close-up shots, and showing the details of a dish or drink.
On the other hand, landscape orientation is perfect for wider scenes that include multiple dishes, a dining setup, or some of the restaurant ambiance. Landscape photos are great for websites, menus, and promotional materials because they provide a broader context. When shooting, consider where the image will be used and choose the orientation that best suits the platform and the story you want to tell.
6. Editing with Purpose: Bringing Out the Best in Every Shot
Editing is where your photos truly come to life. Even the best-shot photos can benefit from some post-processing to enhance colors, adjust lighting, and sharpen details. When editing, aim for a natural look that enhances the food’s appeal. Avoid over-saturating colors or adding heavy filters that can make the food look unappetizing or unrealistic.
Use editing software like Adobe Lightroom or Photoshop to fine-tune exposure, contrast, and white balance. If you’re shooting for a brand, stick to a consistent editing style that aligns with the restaurant’s overall aesthetic. Consistency helps build a recognizable and cohesive brand image that resonates with customers.
Conclusion
Restaurant food photography is about more than just taking a picture of a dish; it’s about creating a narrative that showcases the food, the ambiance, and the brand. By mastering angles, understanding ISO vs. aperture, creating depth, incorporating branding, choosing the right orientation, and editing with purpose, you can produce compelling images that not only look delicious but also tell a story. These tips will help you capture the essence of a restaurant and present its food in the most enticing way possible, making viewers hungry for more.
Some Important Equipment Recommended
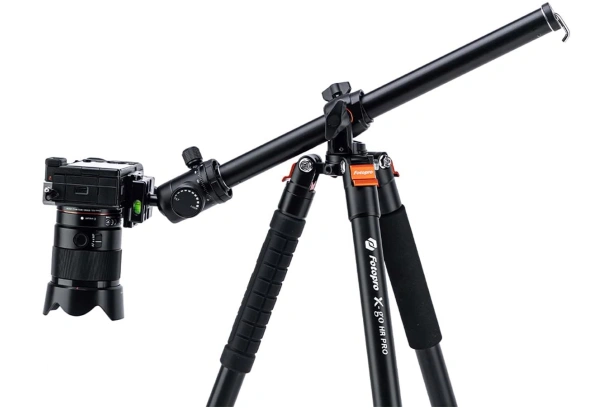
Fotopro 68 inch Camera Tripod Horizontal 360 Tripod
- What We Like
- Versatile and Innovative Design
- Robust and Stable Construction
- Portable and Travel-Friendly
- Multi-Functional and Lightweight
- What We Don’t Like
- Complex Assembly and Usage
- Maintenance and Care Considerations
Unleash your photography creativity with our versatile 360° Horizontal Tripod. Boasting a convertible design, the tripod effortlessly switches to horizontal center column mode, enabling swift adjustments for product, food, desk, macro, and panoramic photography. Crafted from 25mm large diameter aluminum alloy tubes, it supports DSLR cameras with a recommended load of 17.63lbs/8KG and a maximum capacity of 22lbs/10KG, ensuring stability and durability.
This travel-friendly tripod offers adjustable 4-section aluminum legs, folding down to a compact 17.3 inches/44CM, perfect for on-the-go shooting. Additionally, it transforms into a monopod with adjustable height, making it an ideal companion for flexible shooting, hiking, and outdoor adventures, while thoughtful details like inverted center shaft and detachable footbed ensure adaptability in various terrains and shooting scenarios.
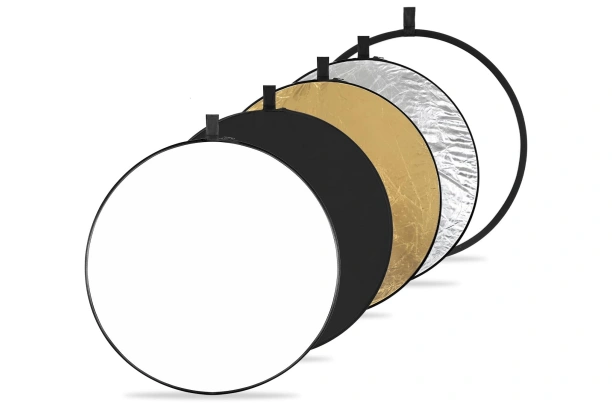
K&F Concept 5-in-1 Light Reflector 32″(80cm) Photography Diffuser
- What We Like
- Versatile Light Modifiers
- Varied Lighting Effects
- Portability and Convenience
- Durable and Reliable Construction
- What We Don’t Like
- Learning Curve for New Users
- Potential for Complexity in Field Usage
Enhance your photography with the K&F Concept 32″ 5-in-1 Portable Photography Reflectors. This set offers gold, silver, white, black, and translucent covers, inclusive of a diffusion panel, providing various lighting effects—softening sunlight, crafting warm fill light, and more. Designed for convenience, the lightweight reflector swiftly folds into a portable size and includes a storage bag for photographers on the move.
Crafted from high-quality, durable fabric with smooth zips, this collapsible reflector set is a versatile, space-saving essential. Please note: this 5-in-1 reflector contains a translucent panel and four color coatings to achieve five distinct photographic effects, making it a practical, multifunctional tool for all your photography needs.
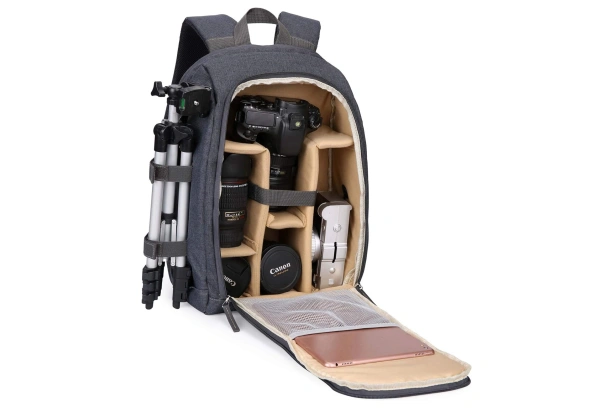
G-raphy Camera Backpack Photography DSLR SLR Backpack Waterproof
- What We Like
- Advanced Protective Material
- Versatile Tripod Compatibility
- Integrated Laptop Compartment
- Portable and Convenient Design
- What We Don’t Like
- Potential Weight Limitations
- Compatibility and Connectivity Considerations
Introducing the G-raphy Laptop Camera Backpack—a cutting-edge companion for creators on the go. Crafted from ballistic nylon, this backpack offers water resistance and protection from the elements, ensuring durability and ease of maintenance. External tripod straps provide versatility for various shots and shooting locations, while the interior houses a separate compartment capable of safeguarding 15.6-inch laptops and notebooks, enabling on-the-go editing.
Compact yet spacious at 17″(H) x 11″(L) x 8″ (W), it’s designed for seamless mobility. With the added convenience of a USB charging port, this backpack integrates tech-savvy features for charging USB-enabled devices. Prepare to elevate your creative pursuits with this versatile, high-tech backpack.
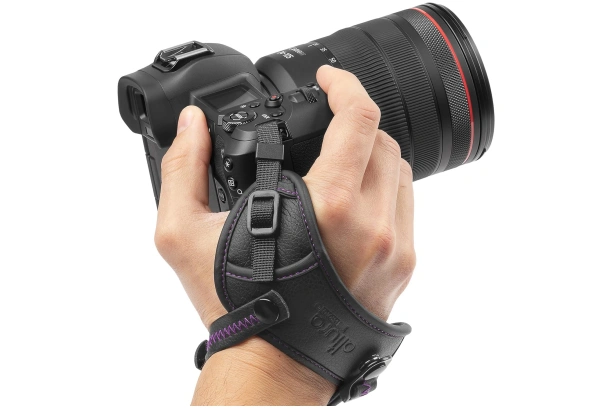
Altura Photo Camera Hand Strap
- What We Like
- Enhanced Camera Security
- Broad Compatibility
- Ergonomic Design
- Stocking Stuffer for Photographers
- What We Don’t Like
- Limitation to Camera Body Handling
- Potential Adjustment Challenges
Elevate your photography experience with our premium PU leather camera hand strap, meticulously designed to secure your camera and provide peace of mind during shoots. Engineered for all hand sizes, it offers a comfortable grip and prevents accidental slips, ensuring the safety of your equipment.
This adjustable DSLR strap seamlessly attaches with a standard ¼” tripod screw mount, offering compatibility with a wide range of DSLR cameras, including Canon EOS Rebels, Sony Alpha series, and various Nikon models. Enhance your shooting confidence and mobility with this versatile, reliable camera accessory, essential for enthusiasts and professionals alike.
SmallRig P96 LED Video Light, Portable Camera Lights
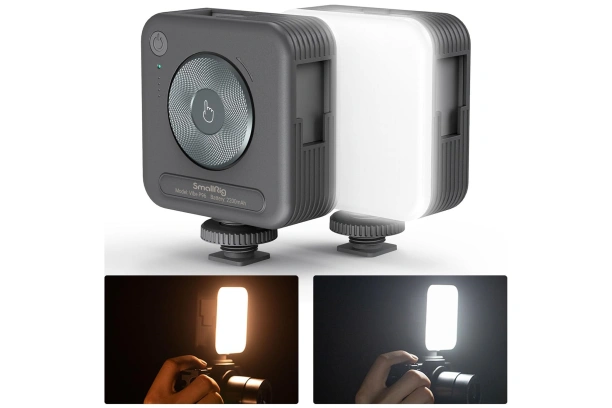
- What We Like
- Portable and Versatile Lighting Solution
- Dimmable and Adjustable Color Temperature
- Long-lasting Battery Capacity
- Versatile Mounting and Compatibility
- What We Don’t Like
- Potential Heat Accumulation
- Mounting Stability Considerations
Elevate your creative pursuits with the SmallRig P96 RGB Video Light—a portable powerhouse. Featuring 96 high-efficiency light beads with a 120° angle and CRI95 rating, it offers natural, lifelike illumination for portraits, weddings, and various photography scenarios. Offering color temperature adjustment from 2700-6500K and 0-100% brightness control, it caters to diverse lighting needs.
Its 2200mAh rechargeable battery provides up to 105 minutes of continuous use, with USB Type-C charging for convenience. The light’s 3 cold shoe mounts and 1/4 screw allow for versatile set-ups, compatible with DSLRs, tripods, and more. Ideal for vlogging, live broadcasts, and cinematic endeavors, it’s a must-have for any creative journey.



Leave a Reply